書店でInterface 5月号を見つけて, 画像処理が懐かしくなったので.
(つい買ってしまった.他にも車載用OSとか面白いしね.)
golangにもimageパッケージという2D画像用ライブラリが標準で備わってるようなのでちょっと使ってみる.
1. 概要
golangの他の標準パッケージと同様, このパッケージも最低限の機能しか用意されていないみたいです.
The Go Programming Language - Package image
ざっと見た感じだと, 以下くらいの機能なのかな?
- アルファ値
- 色空間や濃淡(グレースケール)
- RGB
- CMY
- Gray
- 点
- 矩形
- カラーパレット(pallete)
- 上記の組み合わせ(draw)
- 画像フォーマットのデコード処理(gif/png/jpeg)
Uniformって何.まっさらなとこからやるときに使うのか?
まぁいいや.
あと, 現時点だと扱える画像フォーマットは
- GIF
- JPEG
- PNG
だそうです.
2. 何か書いてみる
とにかく使ってみましょう. 簡単なグラフィックから.
2.1. 箱を描く
簡単そうなのから.
NewRGBAでRGB形式の画像を作成できます.
package main

import (
    "os"
    "image"
    "image/jpeg"
)

func main() {
    x := 0
    y := 0
    width := 100
    height := 50

    // RectからRGBAを作る(ゼロ値なので黒なはず)
    img := image.NewRGBA(image.Rect(x, y, width, height))

    // 出力用ファイル作成(エラー処理は略)
    file, _ := os.Create("sample.jpg")
    defer file.Close()

    // JPEGで出力(100%品質)
    if err := jpeg.Encode(file, img, &jpeg.Options{100}); err != nil {
        panic(err)
    }
}
[実行結果]

2.2. 箱を描く(色指定)
一歩前へ.
Setでピクセル単位に色をセットしていくだけです.
画像サイズはimg.Rectの中にあるX, Yで取得できます.
package main

import (
    "os"
    "image"
    "image/jpeg"
    "image/color"
)

// 画像を単色に染める
func fillRect(img *image.RGBA, col color.Color) {
    // 矩形を取得
    rect := img.Rect

    // 全部埋める
    for h := rect.Min.Y; h < rect.Max.Y; h++ {
        for v := rect.Min.X; v < rect.Max.X; v++ {
            img.Set(v, h, col)
        }
    }
}

func main() {
    x := 0
    y := 0
    width := 100
    height := 50

    // RectからRGBAを作る(ゼロ値なので黒なはず)
    img := image.NewRGBA(image.Rect(x, y, width, height))
    // 赤色に染める(透過なし)
    fillRect(img, color.RGBA{255, 0, 0, 0})

    // 出力用ファイル作成(エラー処理は略)
    file, _ := os.Create("sample.jpg")
    defer file.Close()

    // JPEGで出力(100%品質)
    if err := jpeg.Encode(file, img, &jpeg.Options{100}); err != nil {
        panic(err)
    }
}
[実行結果]

2.3. 箱を描く(枠だけ)
せっかくなので一捻り入れてみました.
package main

import (
    "os"
    "image"
    "image/jpeg"
    "image/color"
)

// 画像を単色に染める
func fillRect(img *image.RGBA, col color.Color) {
    // 矩形を取得
    rect := img.Rect

    // 全部埋める
    for h := rect.Min.Y; h < rect.Max.Y; h++ {
        for v := rect.Min.X; v < rect.Max.X; v++ {
            img.Set(v, h, col)
        }
    }
}

// 枠線を描く
func drawBounds(img *image.RGBA, col color.Color) {
    // 矩形を取得
    rect := img.Rect

    // 上下の枠
    for h := 0; h < rect.Max.X; h++ {
        // 上の枠
        img.Set(h, 0, col)
        // 下の枠
        img.Set(h, rect.Max.Y-1, col)
    }

    // 左右の枠
    for v := 0; v < rect.Max.Y; v++ {
        // 左の枠
        img.Set(0, v, col)
        // 右の枠
        img.Set(rect.Max.X-1, v, col)
    }
}

func main() {
    x := 0
    y := 0
    width := 100
    height := 50

    // RectからRGBAを作る(ゼロ値なので黒なはず)
    img := image.NewRGBA(image.Rect(x, y, width, height))
    // 白色に染める(透過なし)
    fillRect(img, color.RGBA{255, 255, 255, 0})
    // 赤枠を付ける
    drawBounds(img, color.RGBA{255, 0, 0, 0})

    // 出力用ファイル作成(エラー処理は略)
    file, _ := os.Create("sample.jpg")
    defer file.Close()

    // JPEGで出力(100%品質)
    if err := jpeg.Encode(file, img, &jpeg.Options{100}); err != nil {
        panic(err)
    }
}
[実行結果]

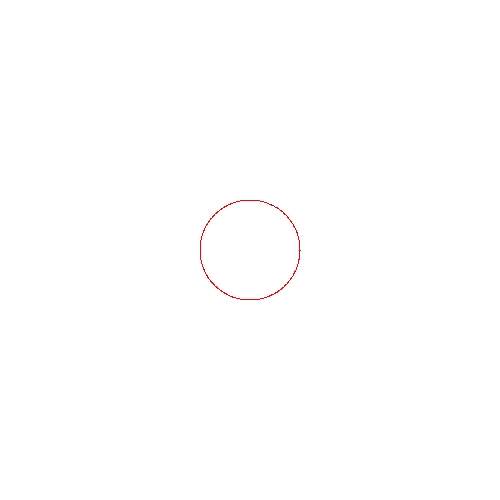
2.4. 円を描く
package main

import (
    "image"
    "image/color"
    "image/jpeg"
    "math"
    "os"
)

// 画像を単色に染める
func fillRect(img *image.RGBA, col color.Color) {
    // 矩形を取得
    rect := img.Rect

    // 全部埋める
    for h := rect.Min.Y; h < rect.Max.Y; h++ {
        for v := rect.Min.X; v < rect.Max.X; v++ {
            img.Set(v, h, col)
        }
    }
}

type Circle struct {
    p image.Point
    r int
}

// 円を描く
func (c *Circle) drawBounds(img *image.RGBA, col color.Color) {
    for rad := 0.0; rad < 2.0*float64(c.r); rad += 0.1 {
        x := int(float64(c.p.X) + float64(c.r)*math.Cos(rad))
        y := int(float64(c.p.Y) + float64(c.r)*math.Sin(rad))
        img.Set(x, y, col)
    }
}

func main() {
    x := 0
    y := 0
    width := 500
    height := 500

    // RectからRGBAを作る(ゼロ値なので黒なはず)
    img := image.NewRGBA(image.Rect(x, y, width, height))
    // 白色に染める(透過なし)
    fillRect(img, color.RGBA{255, 255, 255, 0})

    // 円を描く
    // 中心点
    center := image.Point{250, 250}
    // 円
    circle := Circle{center, 50}
    // 描く
    circle.drawBounds(img, color.RGBA{255, 0, 0, 0})

    // 出力用ファイル作成(エラー処理は略)
    file, _ := os.Create("sample.jpg")
    defer file.Close()

    // JPEGで出力(100%品質)
    if err := jpeg.Encode(file, img, &jpeg.Options{100}); err != nil {
        panic(err)
    }
}
[実行結果]

3. ファイルから画像を読み込み加工する
グラフィックも面白いですが, 画像加工がしてみたいので色々やってみましょう.
元画像はやはりレナさんで.

3.1. 画像を読み込み, サイズを調べる
package main

import (
    "image"
    _ "image/png"
    "os"
    "fmt"
)

func main() {
    // 画像ファイルを開く
    file, _ := os.Open("./rena.png")
    defer file.Close()

    // 設定をデコード
    config, formatName, err := image.DecodeConfig(file)
    if err != nil {
        panic(err)
    }
    // フォーマット名表示
    fmt.Println(formatName)
    // サイズ表示
    fmt.Println(config.Width)
    fmt.Println(config.Height)
}
[実行結果]
$ ./image.exe
png
512
512
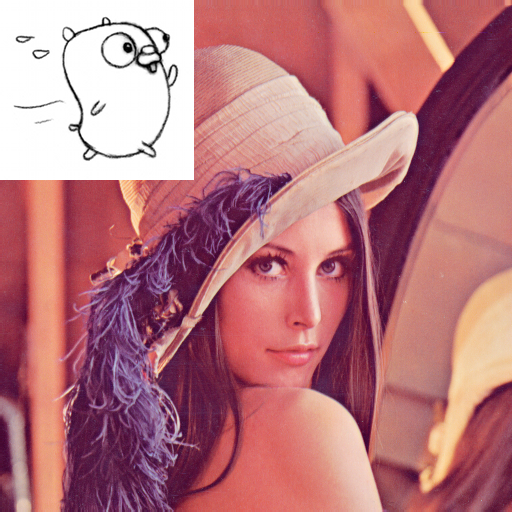
3.2. 画像を合成する
https://golang.org/doc/gopher/に自由に使えるgopher君の画像があるので合成してみます.
package main

import (
    "image"
    "image/png"
    "os"
    "image/draw"
)

func main() {
    // 画像ファイルを開く(書き込み元)
    src, _ := os.Open("./run.png")
    defer src.Close()
    // 画像ファイルを開く(書き込み先)
    dst, _ := os.Open("./rena.png")
    defer dst.Close()

    // デコードしてイメージオブジェクトを準備
    srcImg, _, err := image.Decode(src)
    if err != nil {
        panic(err)
    }
    dstImg, _, err := image.Decode(dst)
    if err != nil {
        panic(err)
    }

    // 書き出し用のイメージを準備
    outRect := image.Rectangle{image.Pt(0, 0), dstImg.Bounds().Size()}
    out := image.NewRGBA(outRect)

    // 描画する
    // 元画像をまず描く
    dstRect := image.Rectangle{image.Pt(0, 0), dstImg.Bounds().Size()}
    draw.Draw(out, dstRect, dstImg, image.Pt(0, 0), draw.Src)
    // 上書きする
    srcRect := image.Rectangle{image.Pt(0, 0), srcImg.Bounds().Size()}
    draw.Draw(out, srcRect, srcImg, image.Pt(0, 0), draw.Over)

    // 書き出し用ファイル準備
    outfile, _ := os.Create("out.png")
    defer outfile.Close()
    // 書き出し
    png.Encode(outfile, out)
}
[実行結果]

なんかえらくシュールな画像になってしまった...
4. もっと画像処理する
せっかくなのでもう少し色々やります.
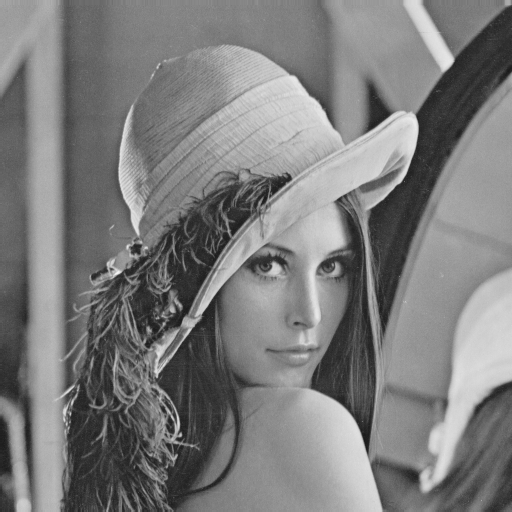
4.1. グレースケール化する
標準パッケージに用意されています.
package main

import (
    "image"
    "image/png"
    "image/color"
    "os"
)

func main() {
    // 画像ファイルを開く(書き込み元)
    src, _ := os.Open("./rena.png")
    defer src.Close()

    // デコードしてイメージオブジェクトを準備
    srcImg, _, err := image.Decode(src)
    if err != nil {
        panic(err)
    }
    srcBounds := srcImg.Bounds()

    // 出力用イメージ
    dest := image.NewGray(srcBounds)

    // グレー化
    for v := srcBounds.Min.Y; v < srcBounds.Max.Y; v++ {
        for h := srcBounds.Min.X; h < srcBounds.Max.X; h++ {
            c := color.GrayModel.Convert(srcImg.At(h, v))
            gray, _ := c.(color.Gray)
            dest.Set(h, v, gray)
        }
    }

    // 書き出し用ファイル準備
    outfile, _ := os.Create("out.png")
    defer outfile.Close()
    // 書き出し
    png.Encode(outfile, dest)
}
[実行結果]

4.2. 2値化する
ちょっと強引かな.
ColorModelとConverterを自作するのが正統派なんですかね.
いずれにしても関数化ぐらいしてもよかったかも.
package main

import (
    "image"
    "image/png"
    "image/color"
    "os"
)

// 二値化のしきい値
const threshold = 128

func main() {
    // 画像ファイルを開く(書き込み元)
    src, _ := os.Open("./rena.png")
    defer src.Close()

    // デコードしてイメージオブジェクトを準備
    srcImg, _, err := image.Decode(src)
    if err != nil {
        panic(err)
    }
    srcBounds := srcImg.Bounds()

    // 出力用イメージ
    dest := image.NewGray(srcBounds)

    // 二値化
    for v := srcBounds.Min.Y; v < srcBounds.Max.Y; v++ {
        for h := srcBounds.Min.X; h < srcBounds.Max.X; h++ {
            c := color.GrayModel.Convert(srcImg.At(h, v))
            gray, _ := c.(color.Gray)
            // しきい値で二値化
            if gray.Y > threshold {
                gray.Y = 255
            } else {
                gray.Y = 0
            }
            dest.Set(h, v, gray)
        }
    }

    // 書き出し用ファイル準備
    outfile, _ := os.Create("out.png")
    defer outfile.Close()
    // 書き出し
    png.Encode(outfile, dest)
}
[実行結果]

まとめ
もうちょっと色々遊ぼうかと思ってましたが, この辺にしときます.
ベースは標準ライブラリで提供されているので, 画像処理アルゴリズムを試したりするのにはちょうどいい気がします.
本格的にやる際には自作でライブラリを用意するほうがいいかもしれないです.
(そしてそれが面白かったりしますよね)